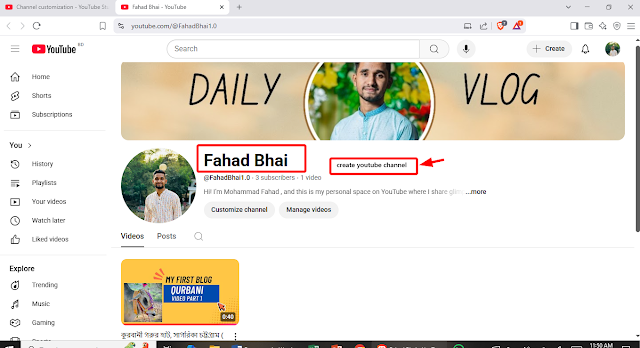
If you've been thinking about sharing your voice, skills, or creativity with the world, launching a YouTube channel is the perfect way to start. But if you’re asking, "How to launch your YouTube channel today?"—don’t worry. This step-by-step guide is made for beginners and aspiring content creators who want to start strong.
Why Launching a YouTube Channel Matters
A Platform with Massive Reach
With over 2 billion monthly users,
YouTube is a powerful platform for visibility, influence, and income.
You Control the Content
It’s your platform to share what you
love, how you want—whether it's tutorials, comedy, music, or product reviews.
Monetization
Potential
YouTube isn’t just for exposure.
Once you meet requirements, you can earn through ads, memberships,
sponsorships, and more.
Step-by-Step
Guide to Launching Your YouTube Channel
Step 1 – Set Up a Google Account
To create a YouTube channel, you
need a Google account.
Instructions:
Step 2 – Create Your YouTube Channel
- Go to Youtube
- Click your profile icon > “Create a channel”
- Add your name, profile photo, and description
Step 3 – Brand Your Channel
Branding is what makes your channel
recognizable.
What to Include:
- Channel banner (2560 x 1440 px recommended)
- Profile photo (typically your logo or headshot)
- Channel description (include keywords and CTA)
Step 4 – Create a Content Plan
Plan for:
- Topics you’re passionate about
- Audience interests
- Upload frequency
- Video formats (tutorials, how-tos, etc.)
Don’t wait for perfection. Done is
better than perfect!
How to Upload:
- Click the camera icon with a plus sign
- Choose "Upload Video"
- Add a title, description, and tags
- Upload a custom thumbnail
Pro Tips:
- Keep your intro short
- Use high-quality thumbnail.
Step 6 – publish advanced setting
First of all go to the setting then click on channel.
After that show (Basic info, Advanced settings, feature eligibility)
1. Basic info = Based on my experience , it would be better if you give atleast 3 keywords.
2. Advanced settings = if your content is not kids content , select the second step and save. Ontop of that , If your content for kids , select 1 st step.
3.
Feature eligibility:
1. standard features = automatically enabled
2. Intermediate features and Advanced
features= you will need to enable those two items.
Step 7 – Copyright checks
It is one of the main issue of the content .so is your video copyrighted?
** Already have a Facebook Page? Learn how to optimize it for growth
How to open facebook page
Step 8 – Engage With Your Audience
- Respond to comments
- Pin important messages
- Ask viewers for feedback
Judgement :
Launching your YouTube channel
doesn’t have to be overwhelming. With the right steps, a bit of planning, and
consistent content, your channel can grow and attract loyal subscribers. Don’t
wait for the perfect time—start now!
Need help running Twitter ads? Here’s my full Twitter ads optimization .
Common Questions:
1. Is it free to create a YouTube channel?
Yes, it’s 100% free to create and
run a channel on YouTube.
2. Do I need expensive equipment?
No. You can start with a smartphone and good lighting.
3. When can I monetize my channel?
After you reach 1,000 subscribers
and 4,000 watch hours within the past 12 months.
4. How often should I upload videos?
Start with one video per week and
adjust as you grow.


0 Comments