In today’s fast-paced digital world, automation is
key to delivering fast and professional customer service.Especially on
Facebook Messenger. If you’re asking, “How can I save Messenger
automation on Meta Business Suite?” you’re not alone.
This step-by-step guide will show you how to set up and save Messenger
automation using Meta’s built-in tools. Whether you're managing a Facebook
Page for a small business, brand, or service, automation can help you stay
responsive—even when you're offline.
Why Messenger Automation Matters
Messenger Automation =
Smarter Communication
Meta Business Suite allows you to automate replies, FAQs, and
custom responses in Messenger. Here’s why you should take advantage of this feature:
1. Customer Service
Even when you're asleep,
automated replies keep customers informed.
2. Faster Response Time
Improve your Page’s
response rate and customer trust.
3. Save Time
No more answering the
same question repeatedly—just automate it.
4. Lead Generation
Messenger automation can
help collect info like name, email, or interest to qualify leads.
Want to boost your
Facebook Page performance before automating? Check out our full guide
on How to Optimize a Facebook Page (Internal Link).
Here’s exactly how to do
it using Meta Business Suite on desktop.
Step 1 – Log Into Meta
Business Suite
Make sure you have admin access to the Page you want to automate.
Step 2 – Access Inbox
Settings
1.
From the left-hand menu,
click Inbox.
2.
At the top of the
screen, click on Automations.
This is where you’ll
find all your current and potential automated replies.
Step 3 – Choose an
Automation Template
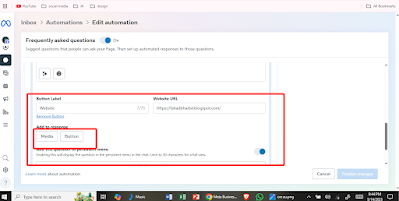
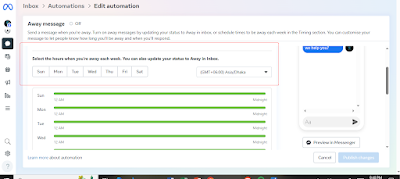
Meta provides several
default automations you can use or customize:
***Popular Automation Templates:
- Instant Reply
- Away Message
- FAQs (Frequently Asked Questions)
- Contact Information Request
- Booking Confirmation
- Custom Keywords
Click “Create
Automation” or choose “Edit” beside an existing one.
Step 4 – Customize Your
Automation
You can now write your
message and define when it’s triggered.
For example:
Instant Reply Template: Hi there! Thanks for messaging us. We’ll get back to you
shortly. In the meantime, check out our latest offers on our website.
You can add:
- Buttons (e.g., “Visit Website”)
- Quick replies
- Emojis
- Personalization (like using the person’s name)
Automation Trigger
Settings:
- During business hours
- Outside business hours
- Always on
Step 5 – Save Your
Messenger Automation
Once you’re done editing, simply click “Save Changes” or “Publish” in the top right corner.
Learn how to run Facebook Ads step by step
Learn now Twitter Ads Made Easy: Your Step-by-Step Guide
Your automation is now
live!
💡 Pro Tip: Always test
your automation by sending a message to your Page from another account.


0 Comments